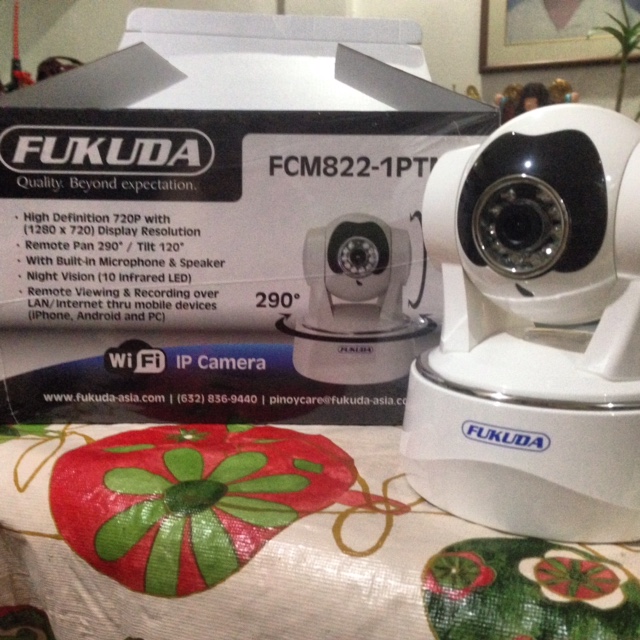
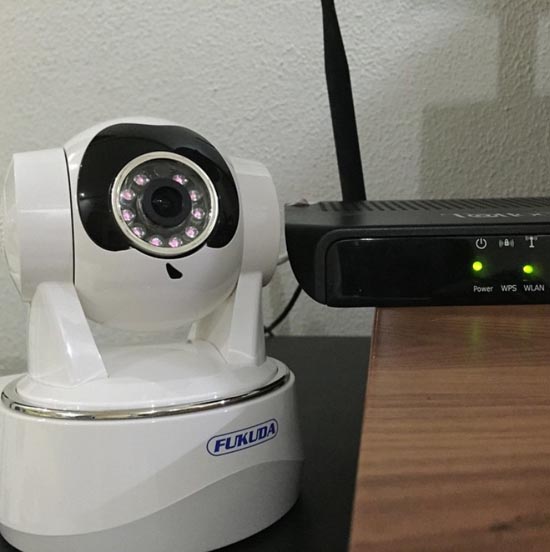
Security is always a priority in households especially when the parents are at work. While my kids do not live with me anymore, I often wished I had a security surveillance camera to monitor their activities at home when they were little. Parents are always in the lookout for iP cameras or Closed Circuit TV (CCTV) that’s easy to use and monitor on the go. You might be interested in this Fukuda iP camera model FCM822-1PTMS for indoor use, which I got to review for the past three weeks. The FukudaCam FCM822-1PTMS is an IP camera that supports LAN and Wifi connection. Though I reviewed this iP camera as an outdoor CCTV , I will only show indoor images for security reasons.
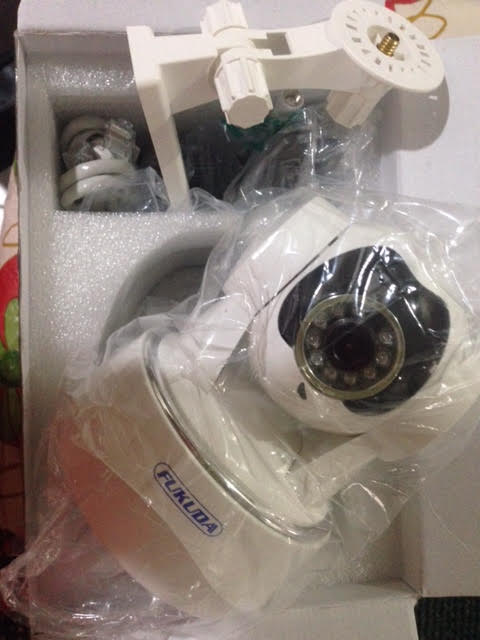
Upon unboxing the Fukuda Camera FCM822-1PTMS, this is what was included:
1. Bracket + Nuts/Bolts
2. Power Adaptor
3. RJ45 Cable
4. Manual
5. Driver and Application CD installer (only for windows)
My connection and gadgets:
1. Macbook Air 2013 model
2. iPhone 6 with Globe GoSurf plan of 5 GB a month
3. Globe Broadband with ProLink modem and a 5 MB bandwidth
Like I said earlier, this particular model is only for indoor use but I was able to use this to monitor the outdoor activities of my home. Our house is situated in a corner lot and there is always a lot of activity in the area. Robbery in two homes across us made me paranoid that outdoor security must be monitored as well. The features of this iP Camera are very impressive.
– Remote Pan 290° / Tilt 120°
– With Built-in Microphone & Speaker
– With Built-in MicroSD Slot (up to 32gb)
– Night Vision (10 Infrared LED), 6m distance
– Indoor use only
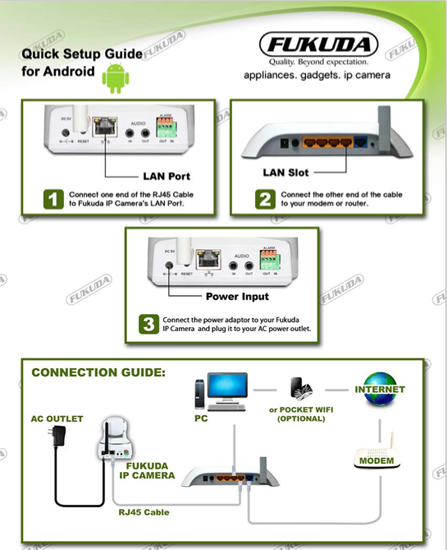
Setting up the Fukuda iP camera
I had a bit of a challenge because the setup instructions were for Windows. I checked the Fukuda Cam review by Gadget Pilipinas and he was using Android and Windows so I had to call tech support for some assistance. I am sure Macbook users like myself will be interested. Fukuda is in the process of developing a software for Mac users.
The iP cam can be viewed in the browser of my Mac via its IP address. However, I needed to have the camera paired with my router first. I followed this setup guide :
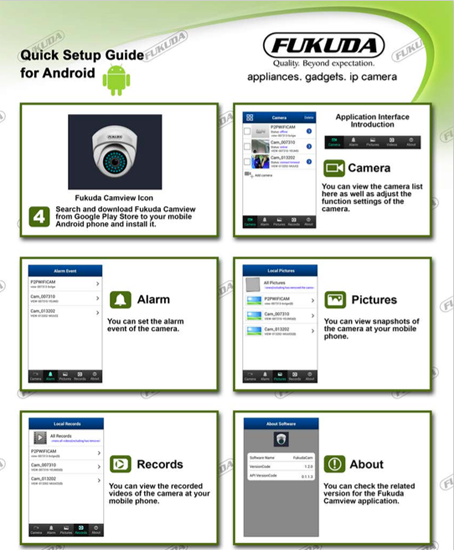
Pairing to my iPhone is almost the same as the set up guide for android.
1. Connect the Fukuda iP camera to the router first. A LAN cable is included in the box. My broadband provider is Globe Telecom. Just so you know, my plan with Globe has a maximum of 5MB connection. It has a decent connection considering I am the only one using it.
2. After downloading the FukudaCam app on my iPhone , I added the camera by scanning the QR code underneath the camera.
3. To complete pairing the FukudaCam to your router:
– select the added camera detail on your phone
– Click “Advance Settings”
– click “Wifi setting” then search for your router’s name.
– Click on this to connect your Fukuda ip camera to your wifi / router.
There was a slight glitch when I first tried to connect to the wifi. In my FukudaCam app, I could not find my wifi name. I exited the app for about an hour and then got back to it. I finally saw the wifi name of my router.
Once connected to the wifi, I was able to view the camera in my iPhone . I removed the LAN cable from the modem since I wanted the camera located in another location. The IP Camera’s Default “Web Access Login” Username is admin while the Password is 123456. I immediately changed the password. Take note that you can only use one mobile gadget at any one time. I get the error “too many users” when I tried to access the app in my iPad. Just disconnect the camera from the power source to get rid of this error message. The error does not show up when I use the web-based dashboard together with the FukudaCam app.
Viewing the camera via IP Address
Since the available software is only for windows , I had to get the IP address on the browser of my macbook air via a “Fing” app which is available in the Apple store. The Fing app will enable me to find out all the units connected to my router.
From the “Fing” app, I discovered the iP address of my Fukuda iP cam which in this case was 192.168.254.100. I typed the IP address on my Safari browser, to be able to view the camera on my mac. The Google Chrome browser has an issue with Quicktime so the Safari was the best browser for me. This is how the web admin access looks like in my Safari browser:

I enabled a fixed IP address so I can easily bookmark the web admin page. From the Home page, I clicked on “System Setup ” to bring me to this configuration menu below. Under network > LAN Settings, I enabled the Fixed IP address and clicked “apply”. 
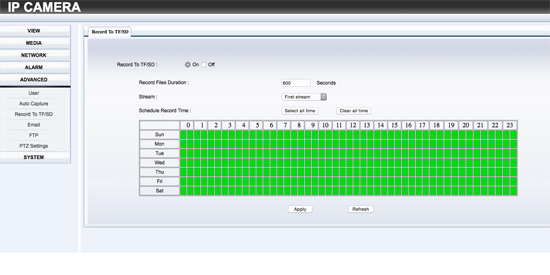
The menu bar of the IP Camera
I just played with the menu bar to configure the rest of the setup. I saved images or video to the SD Card under “Advanced” and selected the time intervals for recording. I tried to configure the FTP but I am unable to upload images to my server where my blogs are hosted. I will still have to figure that out , including saving images to my Samsung Home Sync.
Under “Alarm” , I set it up to trigger motion detection but I removed it later. I also configured the camera to save the video on the micro SD Card. The box did not come with a micro SD card though so I had to use my Samsung micro SD card.
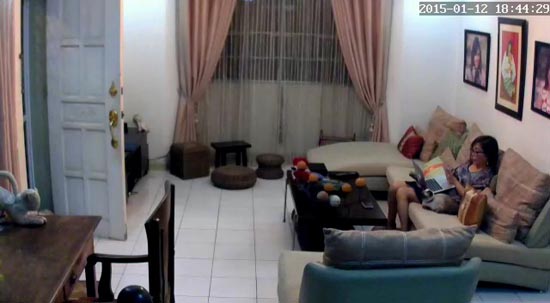
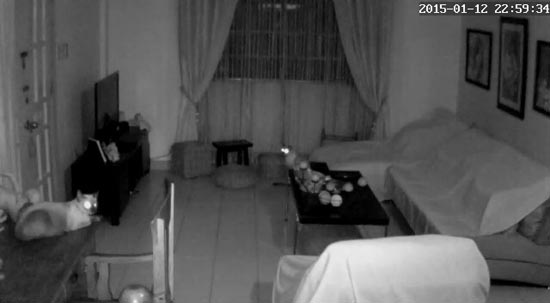
When it is night time or there is little sunlight, the color of the video turns to black and white. I turned the chandelier light to get a colored image.
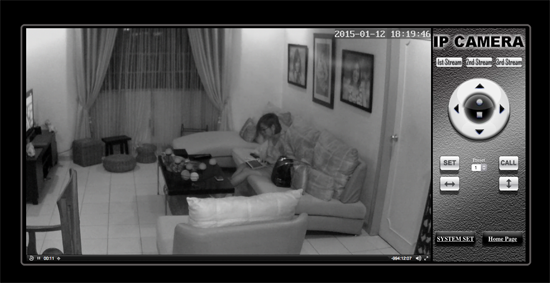
On my FukudaCam app, I saved this image . It’s clear , right? The resolution settings for this is 1280 x 720 . My cat is watching me work.
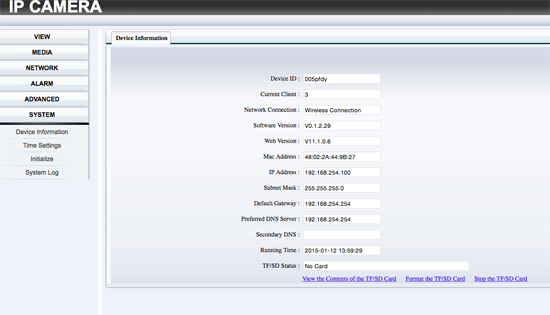
Now how about saving the video? I chose to save it on the micro SD card. The slot can accommodate up to 32 GB. Under ” System > Device information>View the contents of the TF/SD card”, I can view the contents of the SD card.
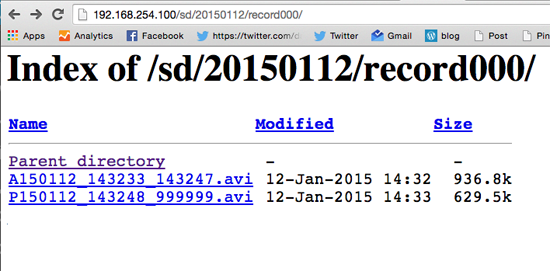
I was pleased to see the recorded video in this directory which I downloaded to my macbook.
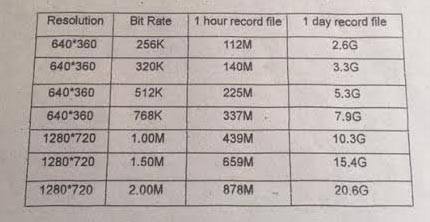
I asked the Fukuda Technician to give me an idea of the usage space of the stored videos. For the setup I configured, a one day record file will reach to 20.6 gigabytes for a 1280 x 720 resolution , 2.00 M bit rate. See the rest of the recorded files. This means that I would need to format my 32 GB SD card every day. But then, I don’t need to record the whole day. I can just configure the camera to record at certain intervals, perhaps just 12 hours a day.
The camera comes with a microphone and a jack for the audio. While I was checking the two Siamese cats to see who was peeing on the couch, they turned towards the camera. I told them to behave. LOL. It’s one reason I cover the couch with cloth and plastic covers every night.
Impressions of the Fukuda iP Camera
As I mentioned earlier, I reviewed this iP camera as an outdoor CCTV . While I was mobile, I got to view the FukudaCam app . I am impressed that I am able to see what is happening outside my home. With the 290 remote pan capability, I can touch the monitor of my iphone to rotate the view , panning a wider coverage . There were times, I had difficulty connecting to the camera remotely but 90% of the time, I was able to view the camera. Maybe it was my mobile connection that failed to connect.
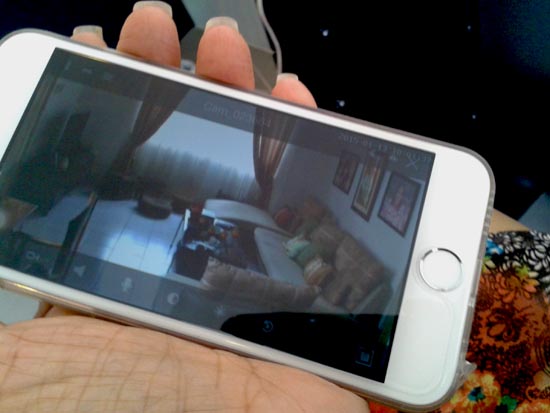
The technician said that if I intend to make this particular model, an outdoor camera, I should install it just below the roof , nailed to the ceiling to avoid direct sunlight exposure or being drenched by the rains. I might need to get their outdoor cam but that’s another story.
For home use, the FukudaCam FCM822-1PTMS is quite useful as it pans the room at a wide angle. Video recording is quite easily done through the SD card and web configuration. The disadvantage is that one has to format the card every few days. I still have to configure the camera to a disk drive. The problem is during brownouts because there is no battery to power the camera.
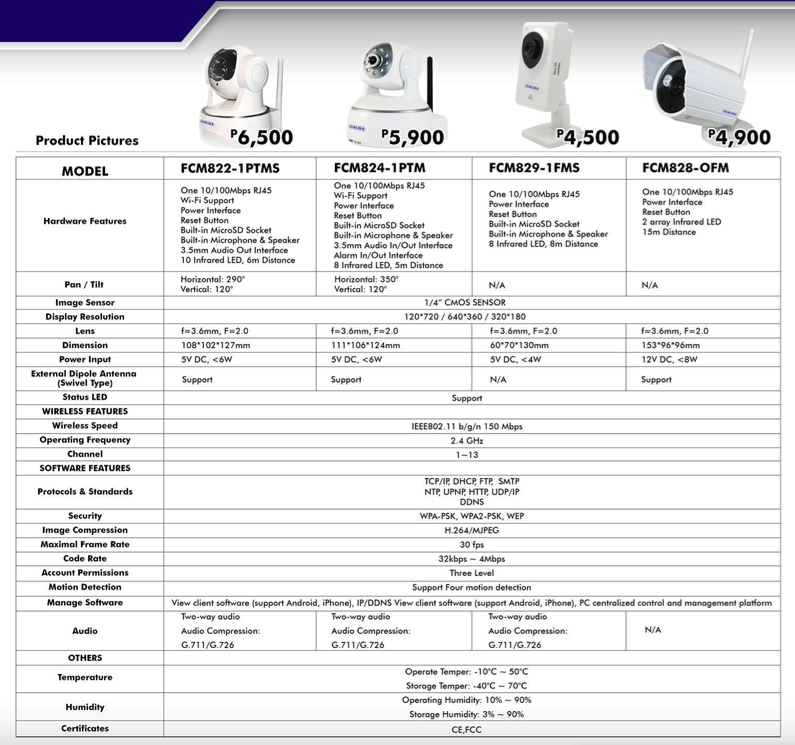
Priced at P6,500 pesos, it is your best choice, compared to other brands that offer similar features but at a much higher price. Fukuda has also other models that you can view on their website or this image below.
You can also check the review of another Fukuda iP indoor camera model FCM829-1FMS by Jen Aspacio.
How to order
OPTION 1: You can order online through:
Email: [email protected]
Please include the following details:
1. Name (yours)
2. Contact Number (yours)
3. Name, Address and Contact Number of the recipient
4. Quantity
Once deposit slip has been emailed back to us, we will scan you a copy of the courier waybill for the shipment.
Warranty is one year parts and service.
OPTION 2: You can also order by paying to our Factory outlet, and we will send it to the intended recipient address for FREE!
Fukuda Factory Outlet and Service Center (Cubao and Sucat only)
Cubao, Quezon City:
SA10 Session Apartment, Session Road,
Araneta Center Cubao, Quezon City
(Located across delivery area of the Wet market of Farmers market, very near MRT station)
Hotline: (632)710-9245
Monday to Sunday (10am-7pm)
Sucat, Paranaque
6A Dama de Noche St.
Barangay Marcelo Green,
Sucat, Paranaque City
Location Reference: UPS 4(closer to Sucat SLEX exit) is located at West Service Road between Sucat and Bicutan. Eastwest Bank is the landmark to enter UPS 4.
Hotline: (632) 836-9440
Monday to Friday (8:30am – 6:30pm)
Saturday (8:30am – 12:30pm)
One year warranty for parts and services.
Check their Facebook account at https://www.facebook.com/fukudaoutletandservice
One thought on “Setting up a Fukuda iP Camera/CCTV with my iPhone 6 & Macbook Air”
Thanks for the mention, Ms.Noemi. This is a very comprehensive review, and useful for first time users.